


Students often ask what the purpose is in learning studio lighting for portraits, when they really don't have an interest in setting up their own studios or portrait business. It's a great question, and easily answered. You need to know what the classical lighting setups are in order to be aware of them when they occur in nature! Even if you never work with any artificial light, it would behoove you to learn what it's all about. Many would-be photographers can recognize a good, crisp light on a building, but really couldn't tell you how it was created - how the sun and shadows play with each other to create an interesting light.
So, if you learn your studio lighting, you will be better able to spot them as they happen and take advantage of the various effects created. Your photographs will improve dramatically! Don't forget that it is really light that makes a photograph special!
There are many studio lighting setups. Here are just a few:
- Hollywood Light:
- Rembrandt Light
- Side Light
- Edge Light
- Halo Light
- Silhouette Light
I'm only going to concentrate on the first six studio lighting setups for this article. There are quite a few more, but once you learn them, you should be able to recognize them when you see them. To help you do this, I've included some examples of these lightings here alongside similar lightings I've found in nature
1. Hollywood Light:
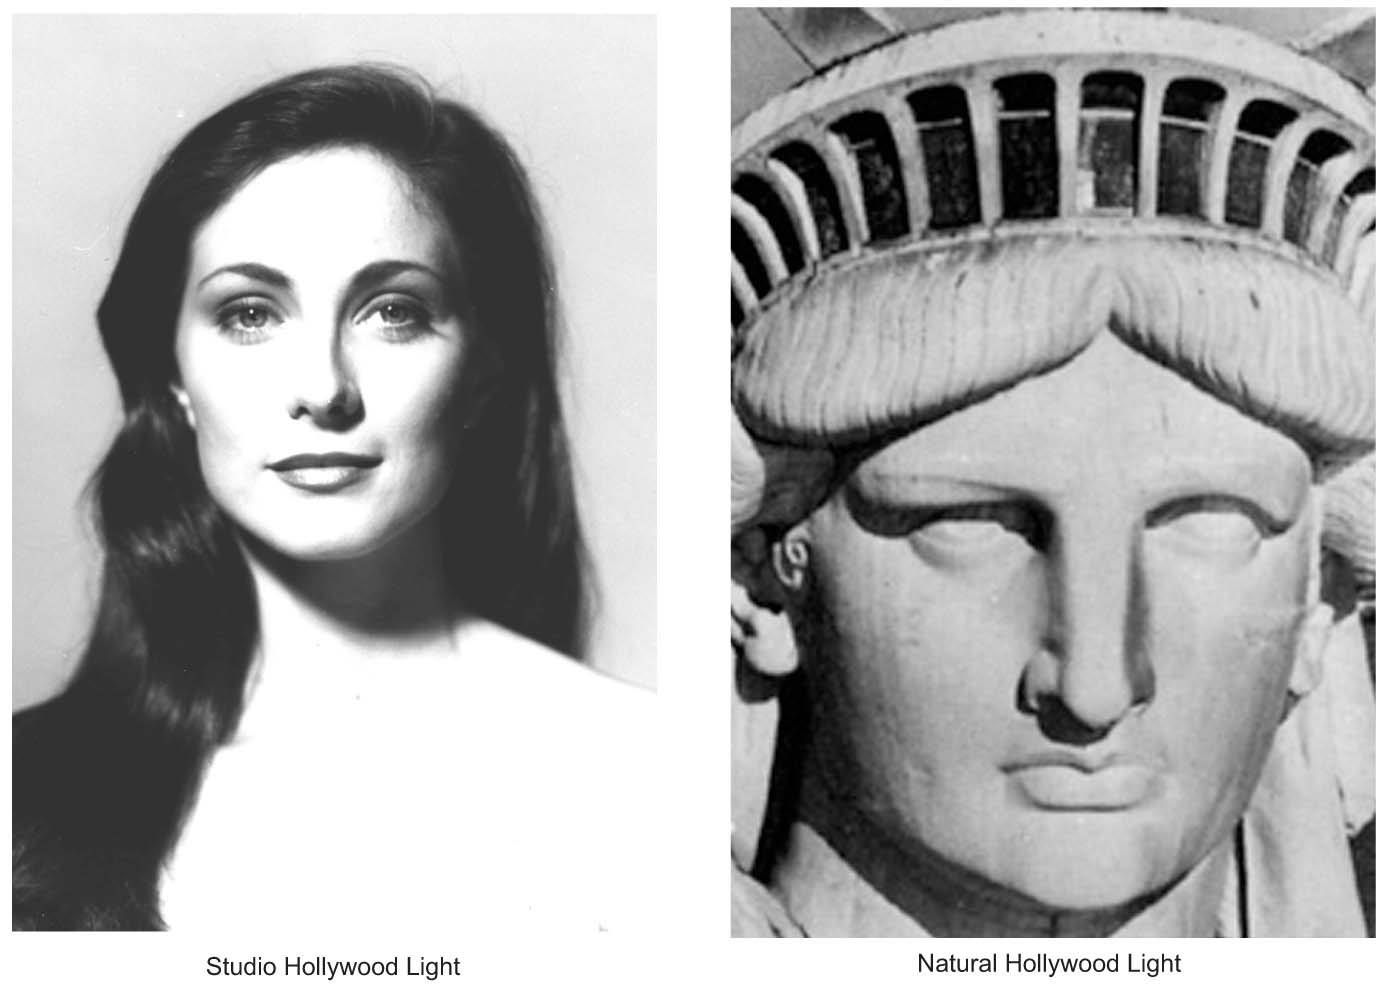
The "natural" image was made from a helicopter with a 4x5 flat-bed view camera mounted on a gyroscope. I went up just at the right time for the sun to create this lighting on the famous statue. Note the telltale shadow under the nose! In the studio version, the light was simply on the other side of the face.
2. Rembrandt Light:
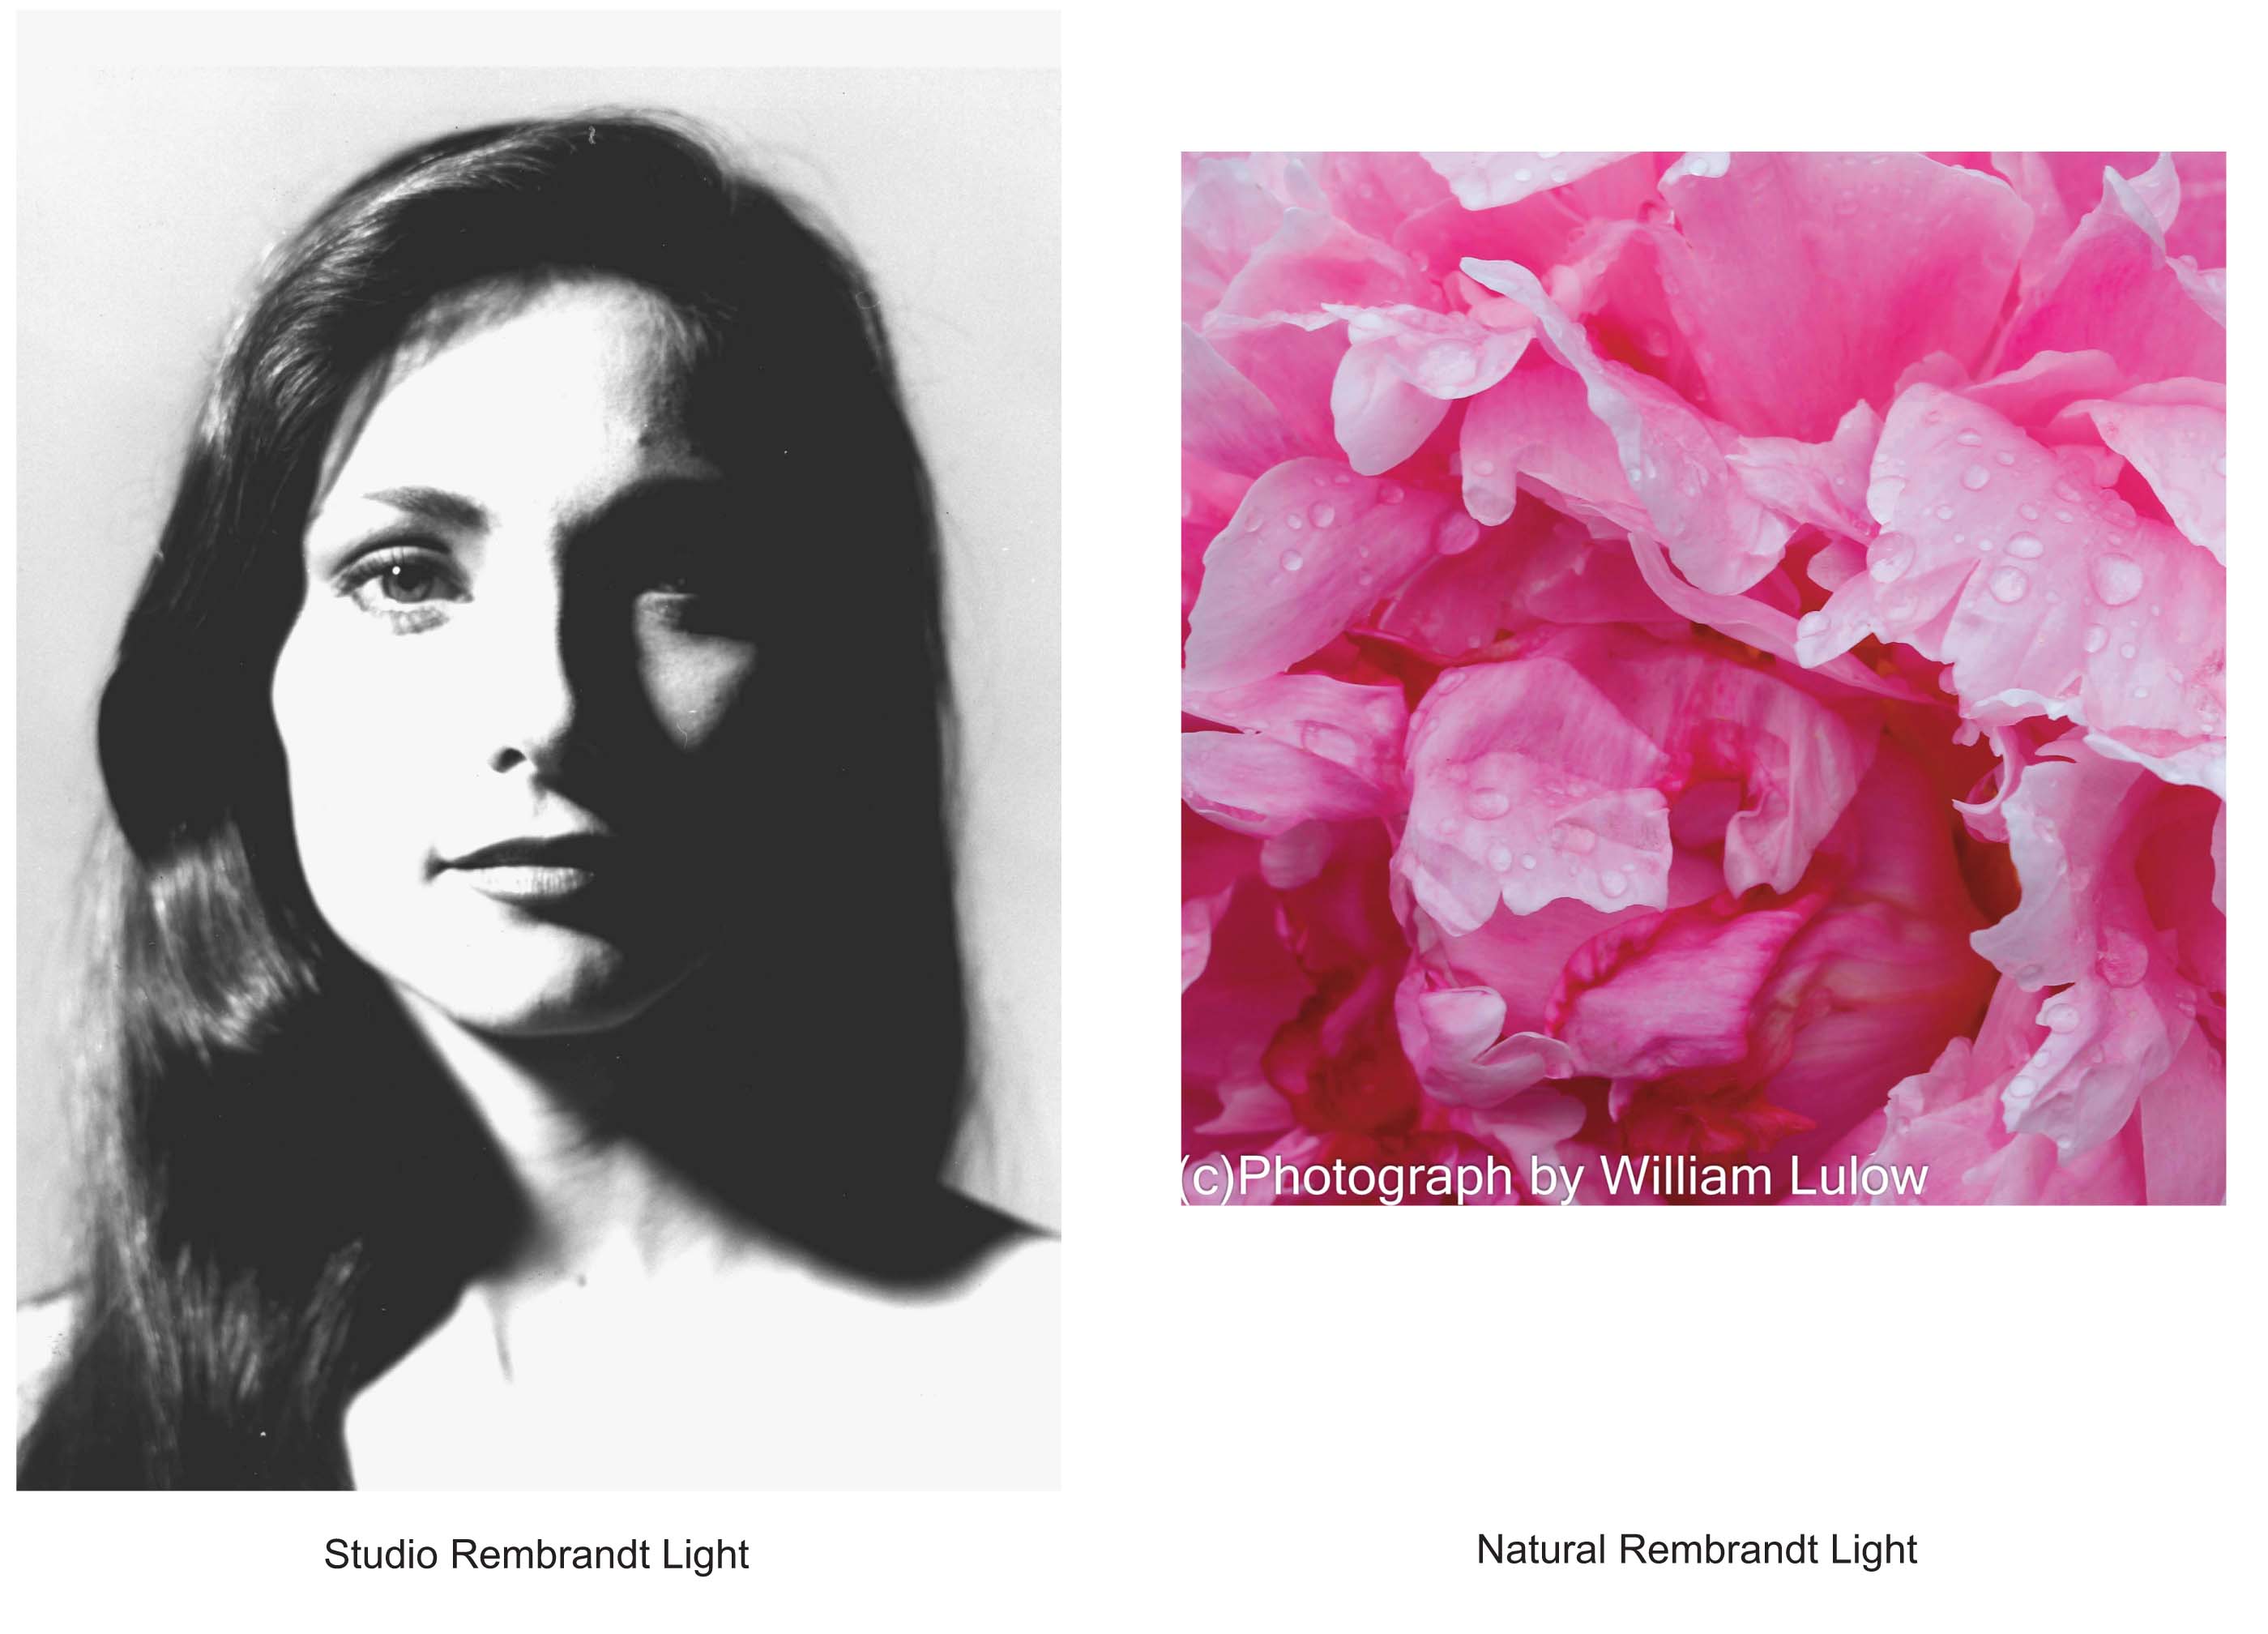
The shot of some peonies was made when the sun was about 45-degrees to the right of the flower and made this light. (Note where the shadows are.) The shadows will tell you the kind of light you are using. The studio Rembrandt Light was made with the light at a 45-degree angle from the camera position and above the camera as well.
3. Side Light:
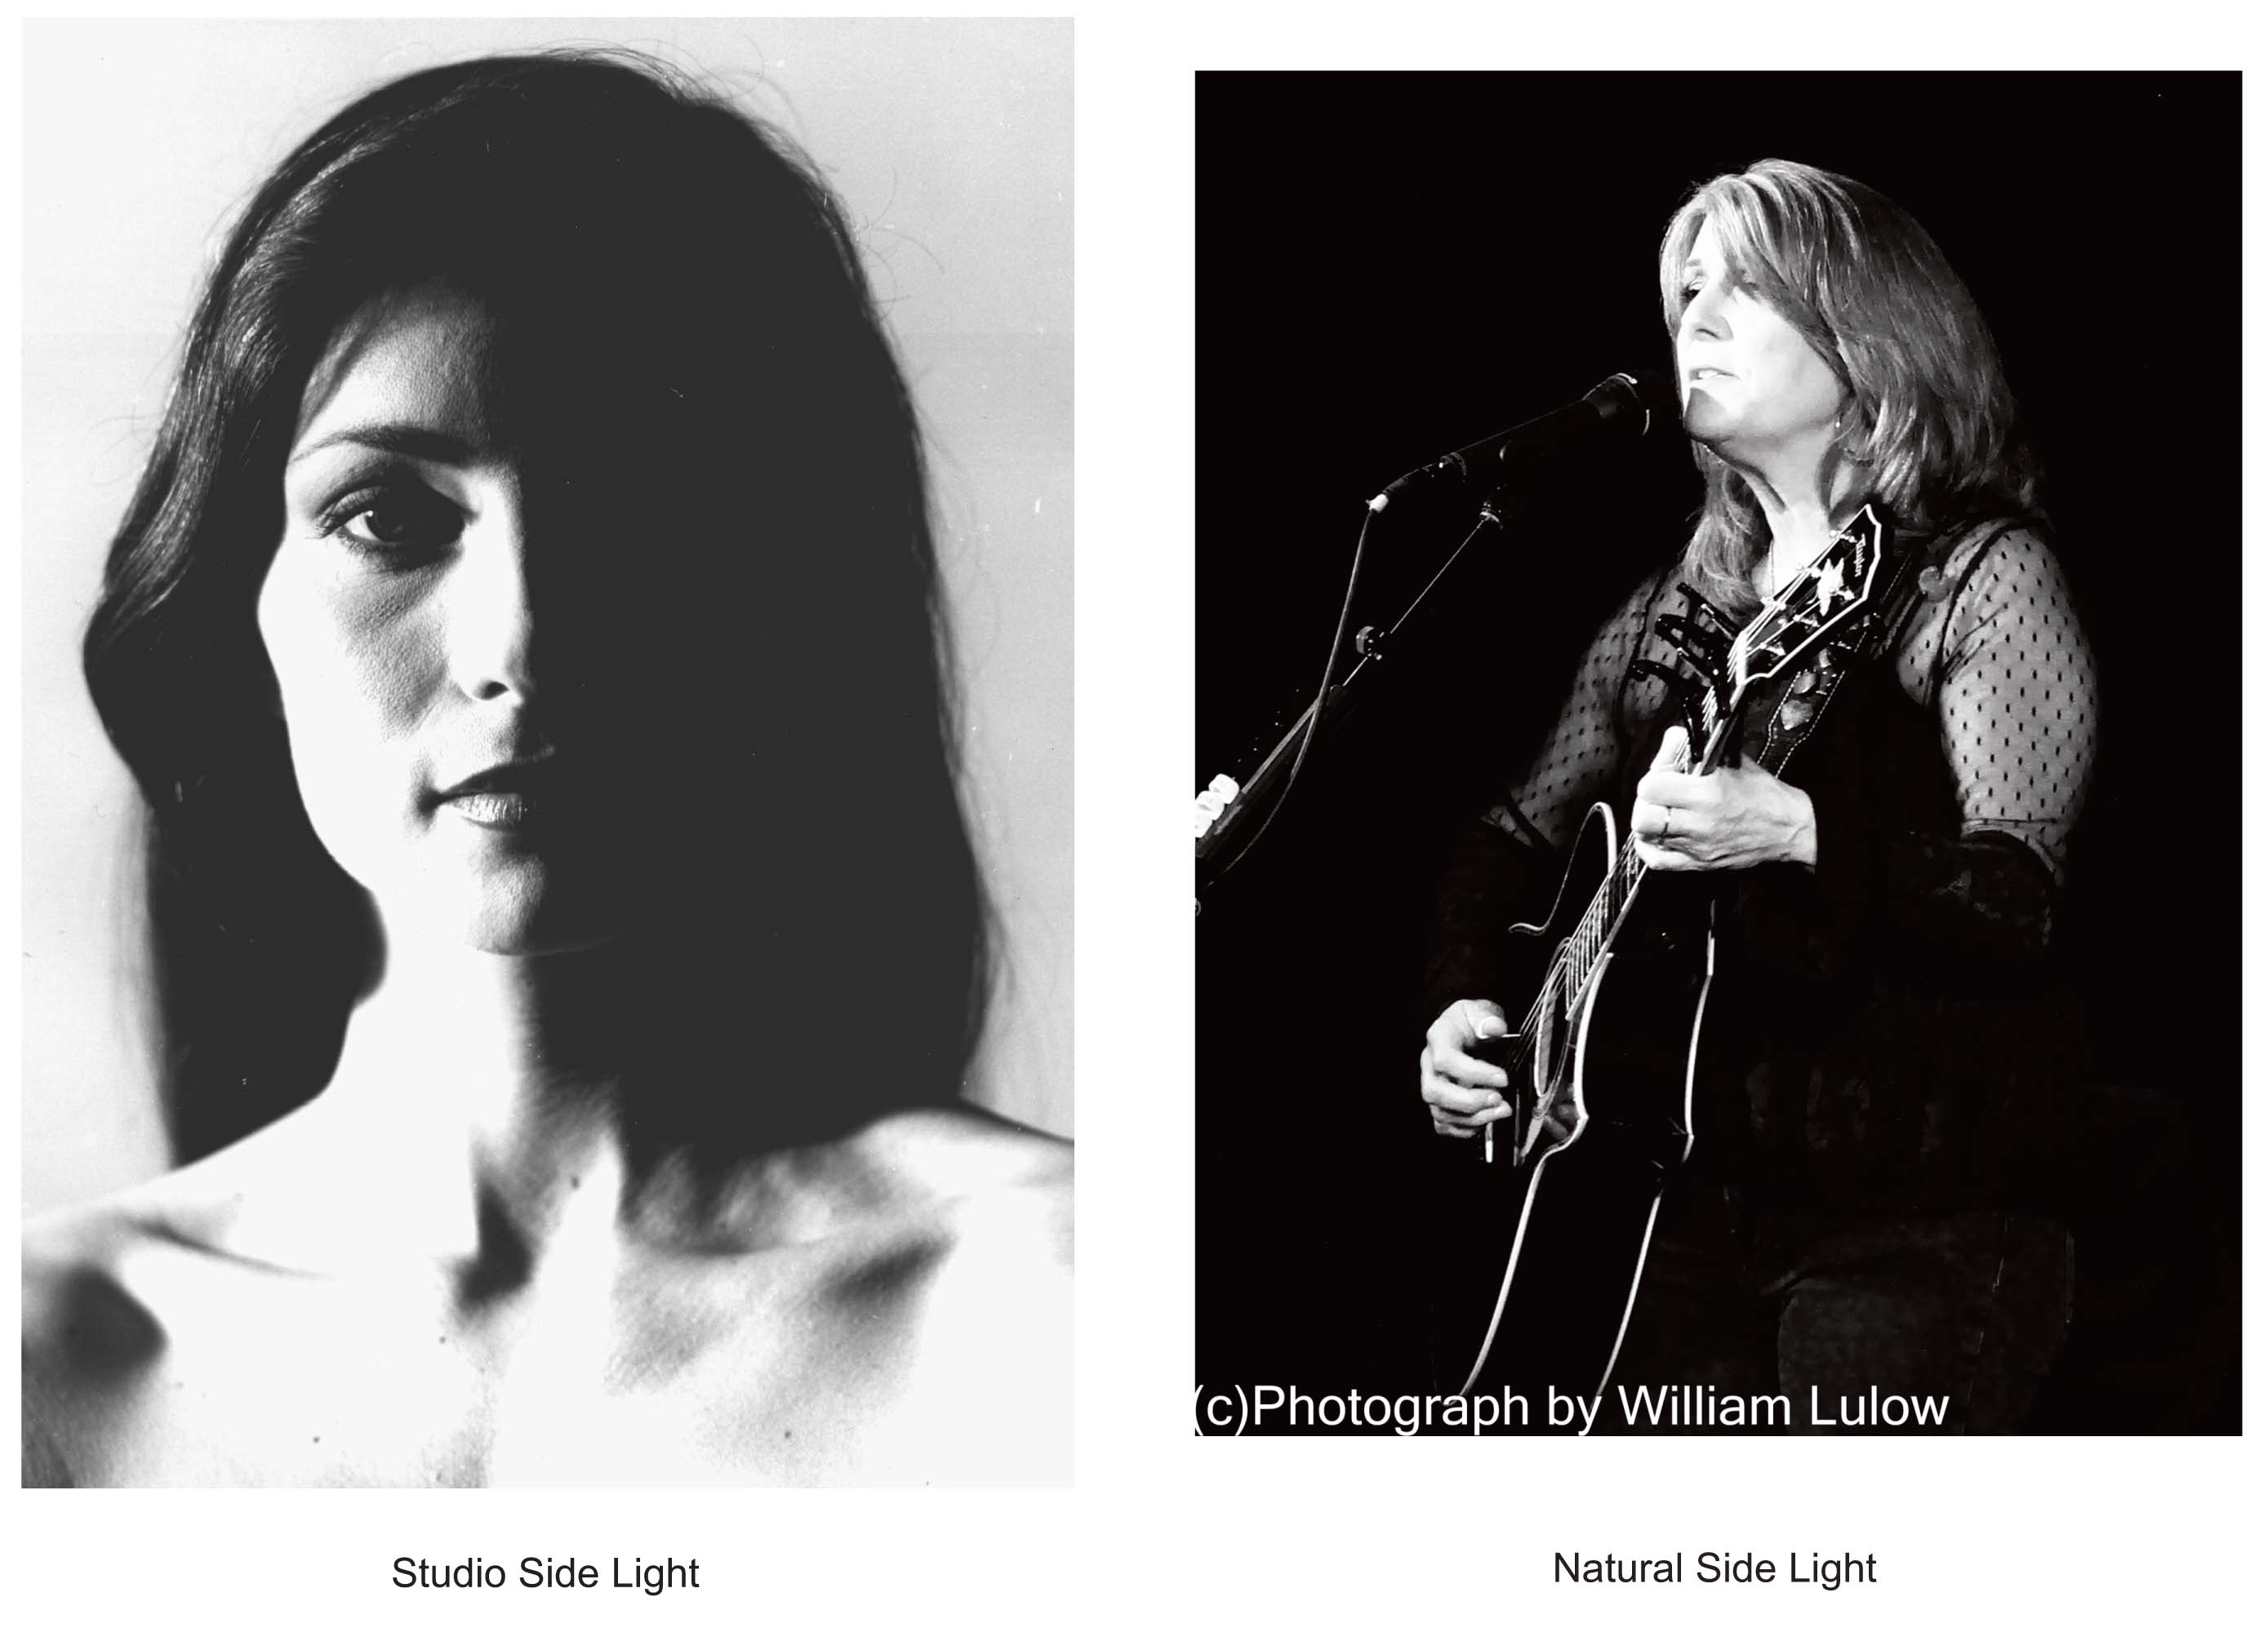
Shooting a performance from the side is a great example of how to use a SIDE LIGHT. When you stand next to the stage, the lights are in front of the stage. But from the camera's position, they make a SIDE LIGHT.
4. Edge Light:

The EDGE LIGHT comes from 45 degrees behind the subject and lights just the edge of the face (hence the name). In this "natural" shot, the light was coming from just behind the subject as well, creating a nice highlight on the shoreline's edge.
5. Halo Light:
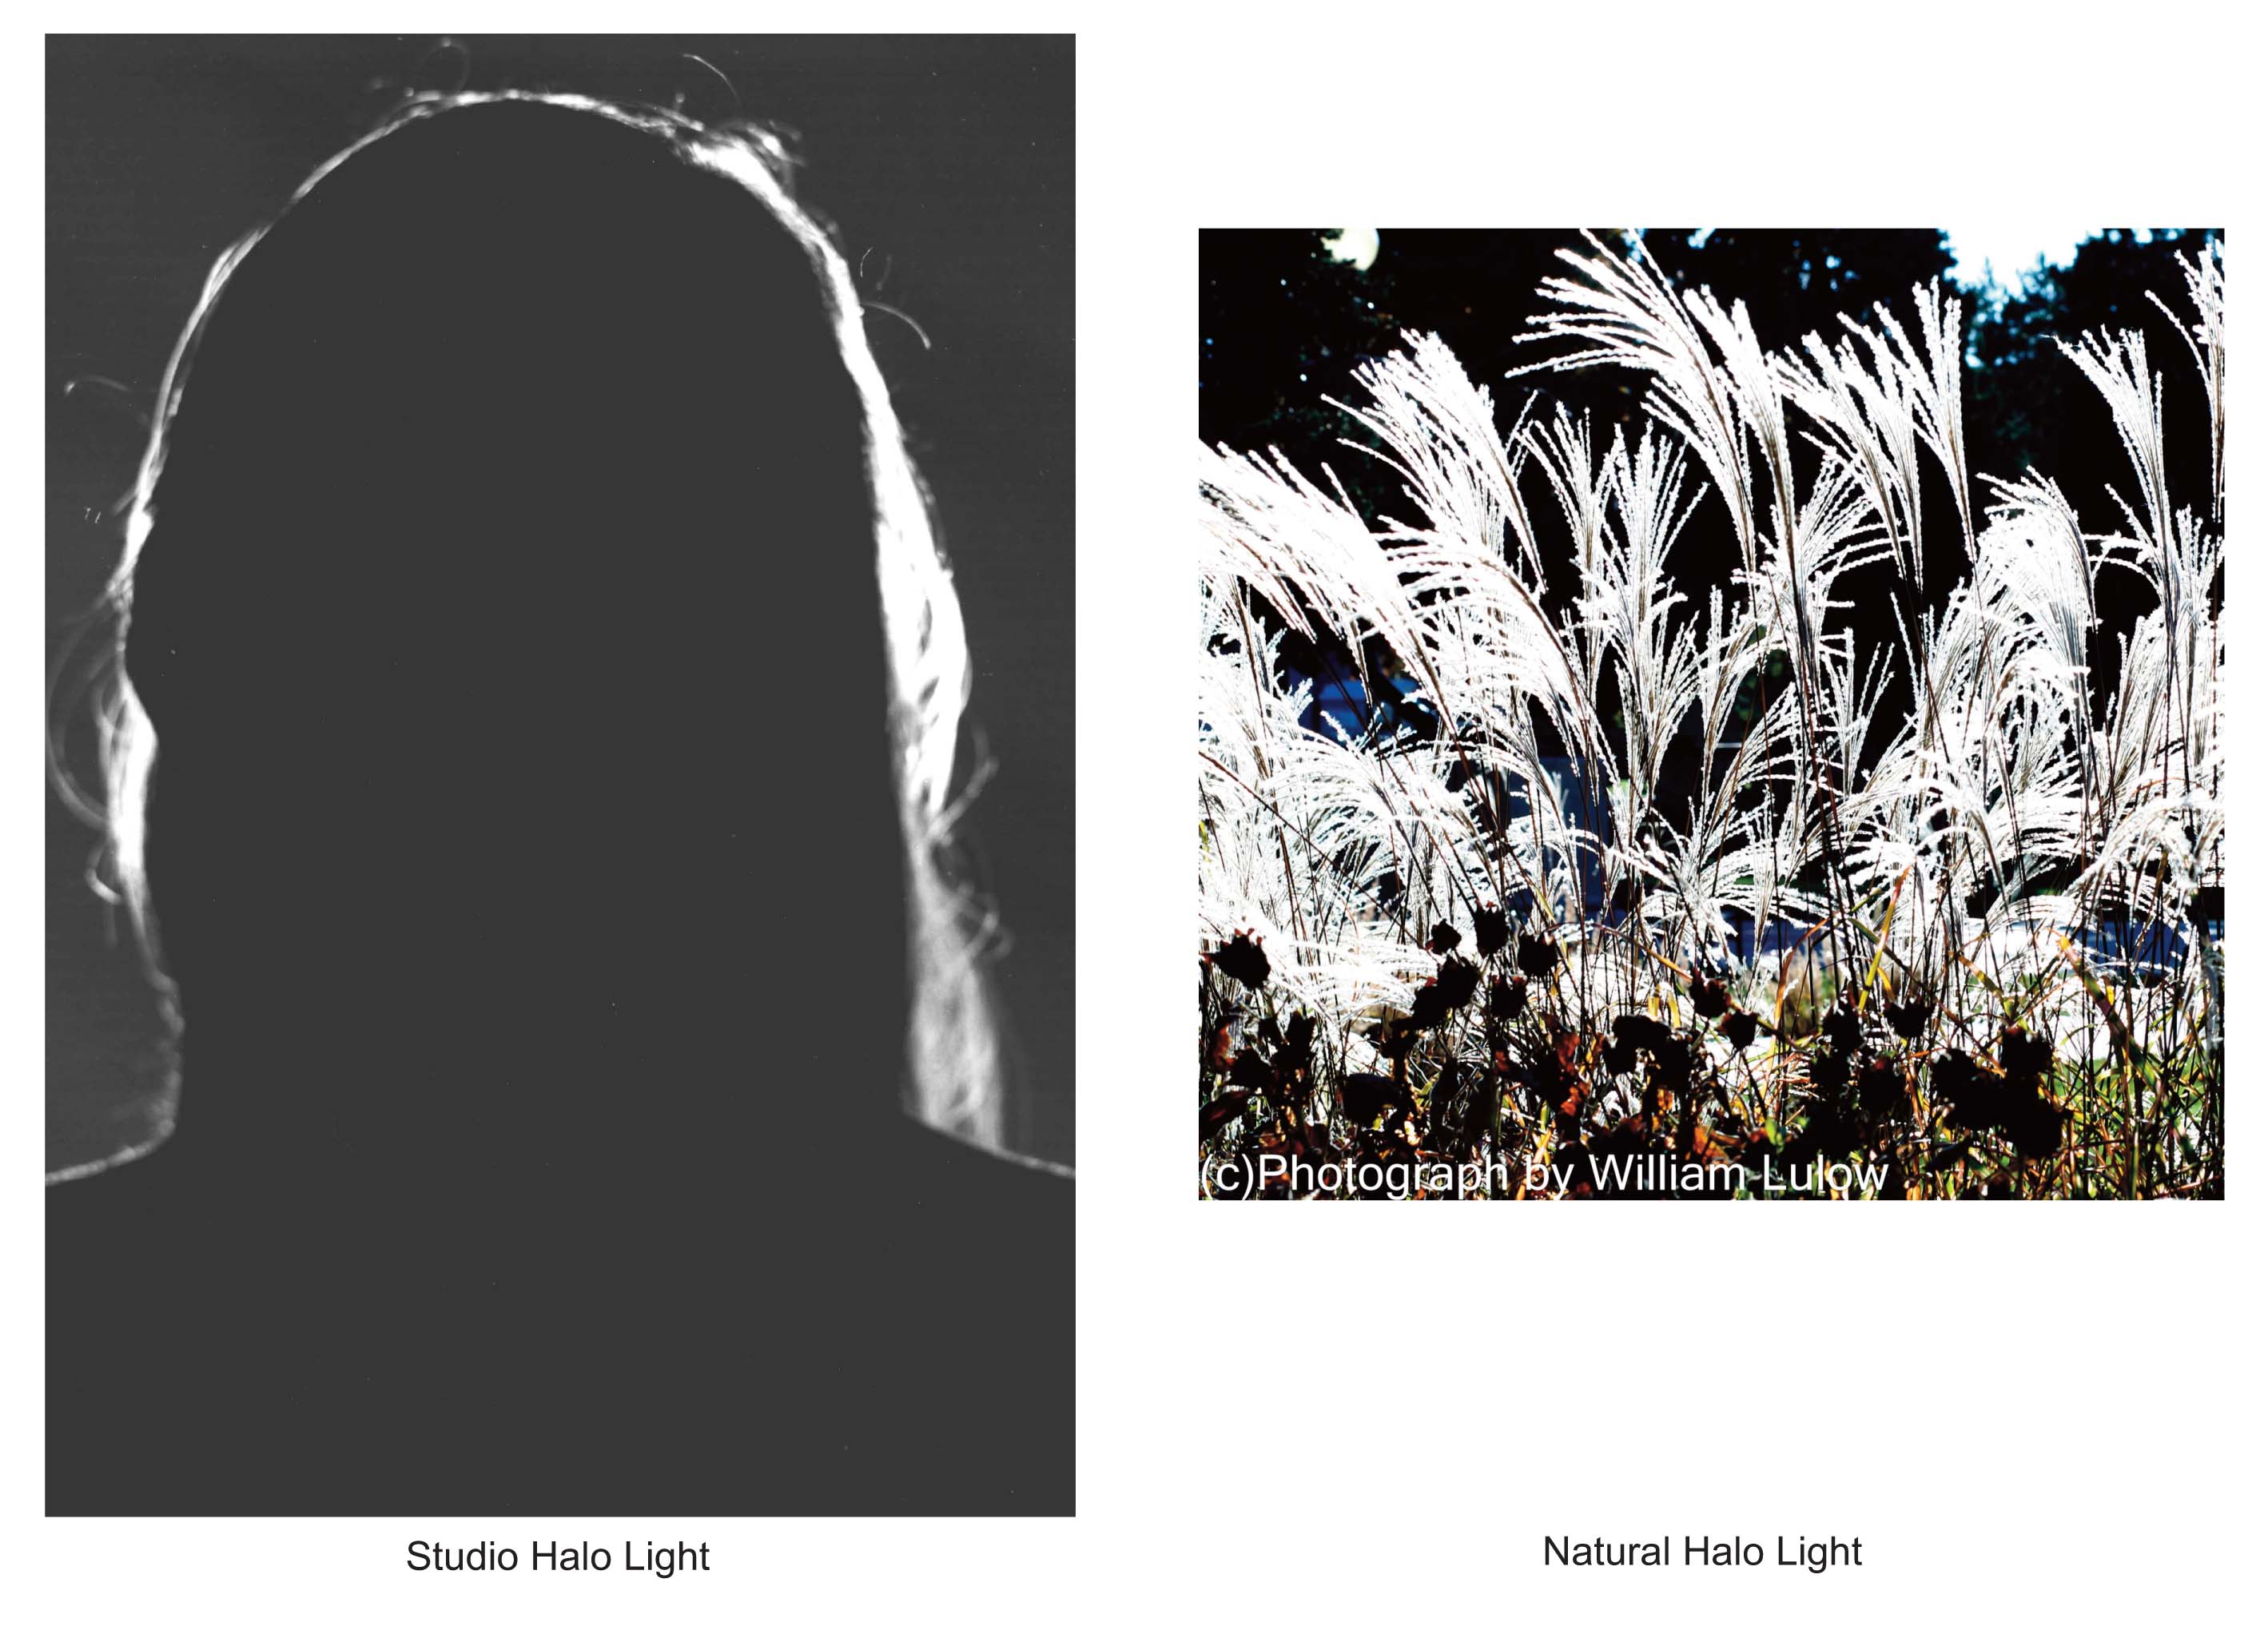
The HALO LIGHT is created by putting the light directly behind the subject and making the shadow of the subject fall on the camera lens. Often tricky to do in nature, this image was made with the sun just about directly behind these plants. I had to use my hat as a lens shade. Sometimes I use a black umbrella to shade my lens. You can often stand in the shadow of a tree or building and photograph your subject in the sun with the light behind it, thus creating a "halo."
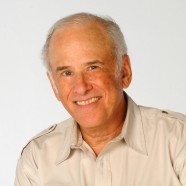
6. Silhouette Light:
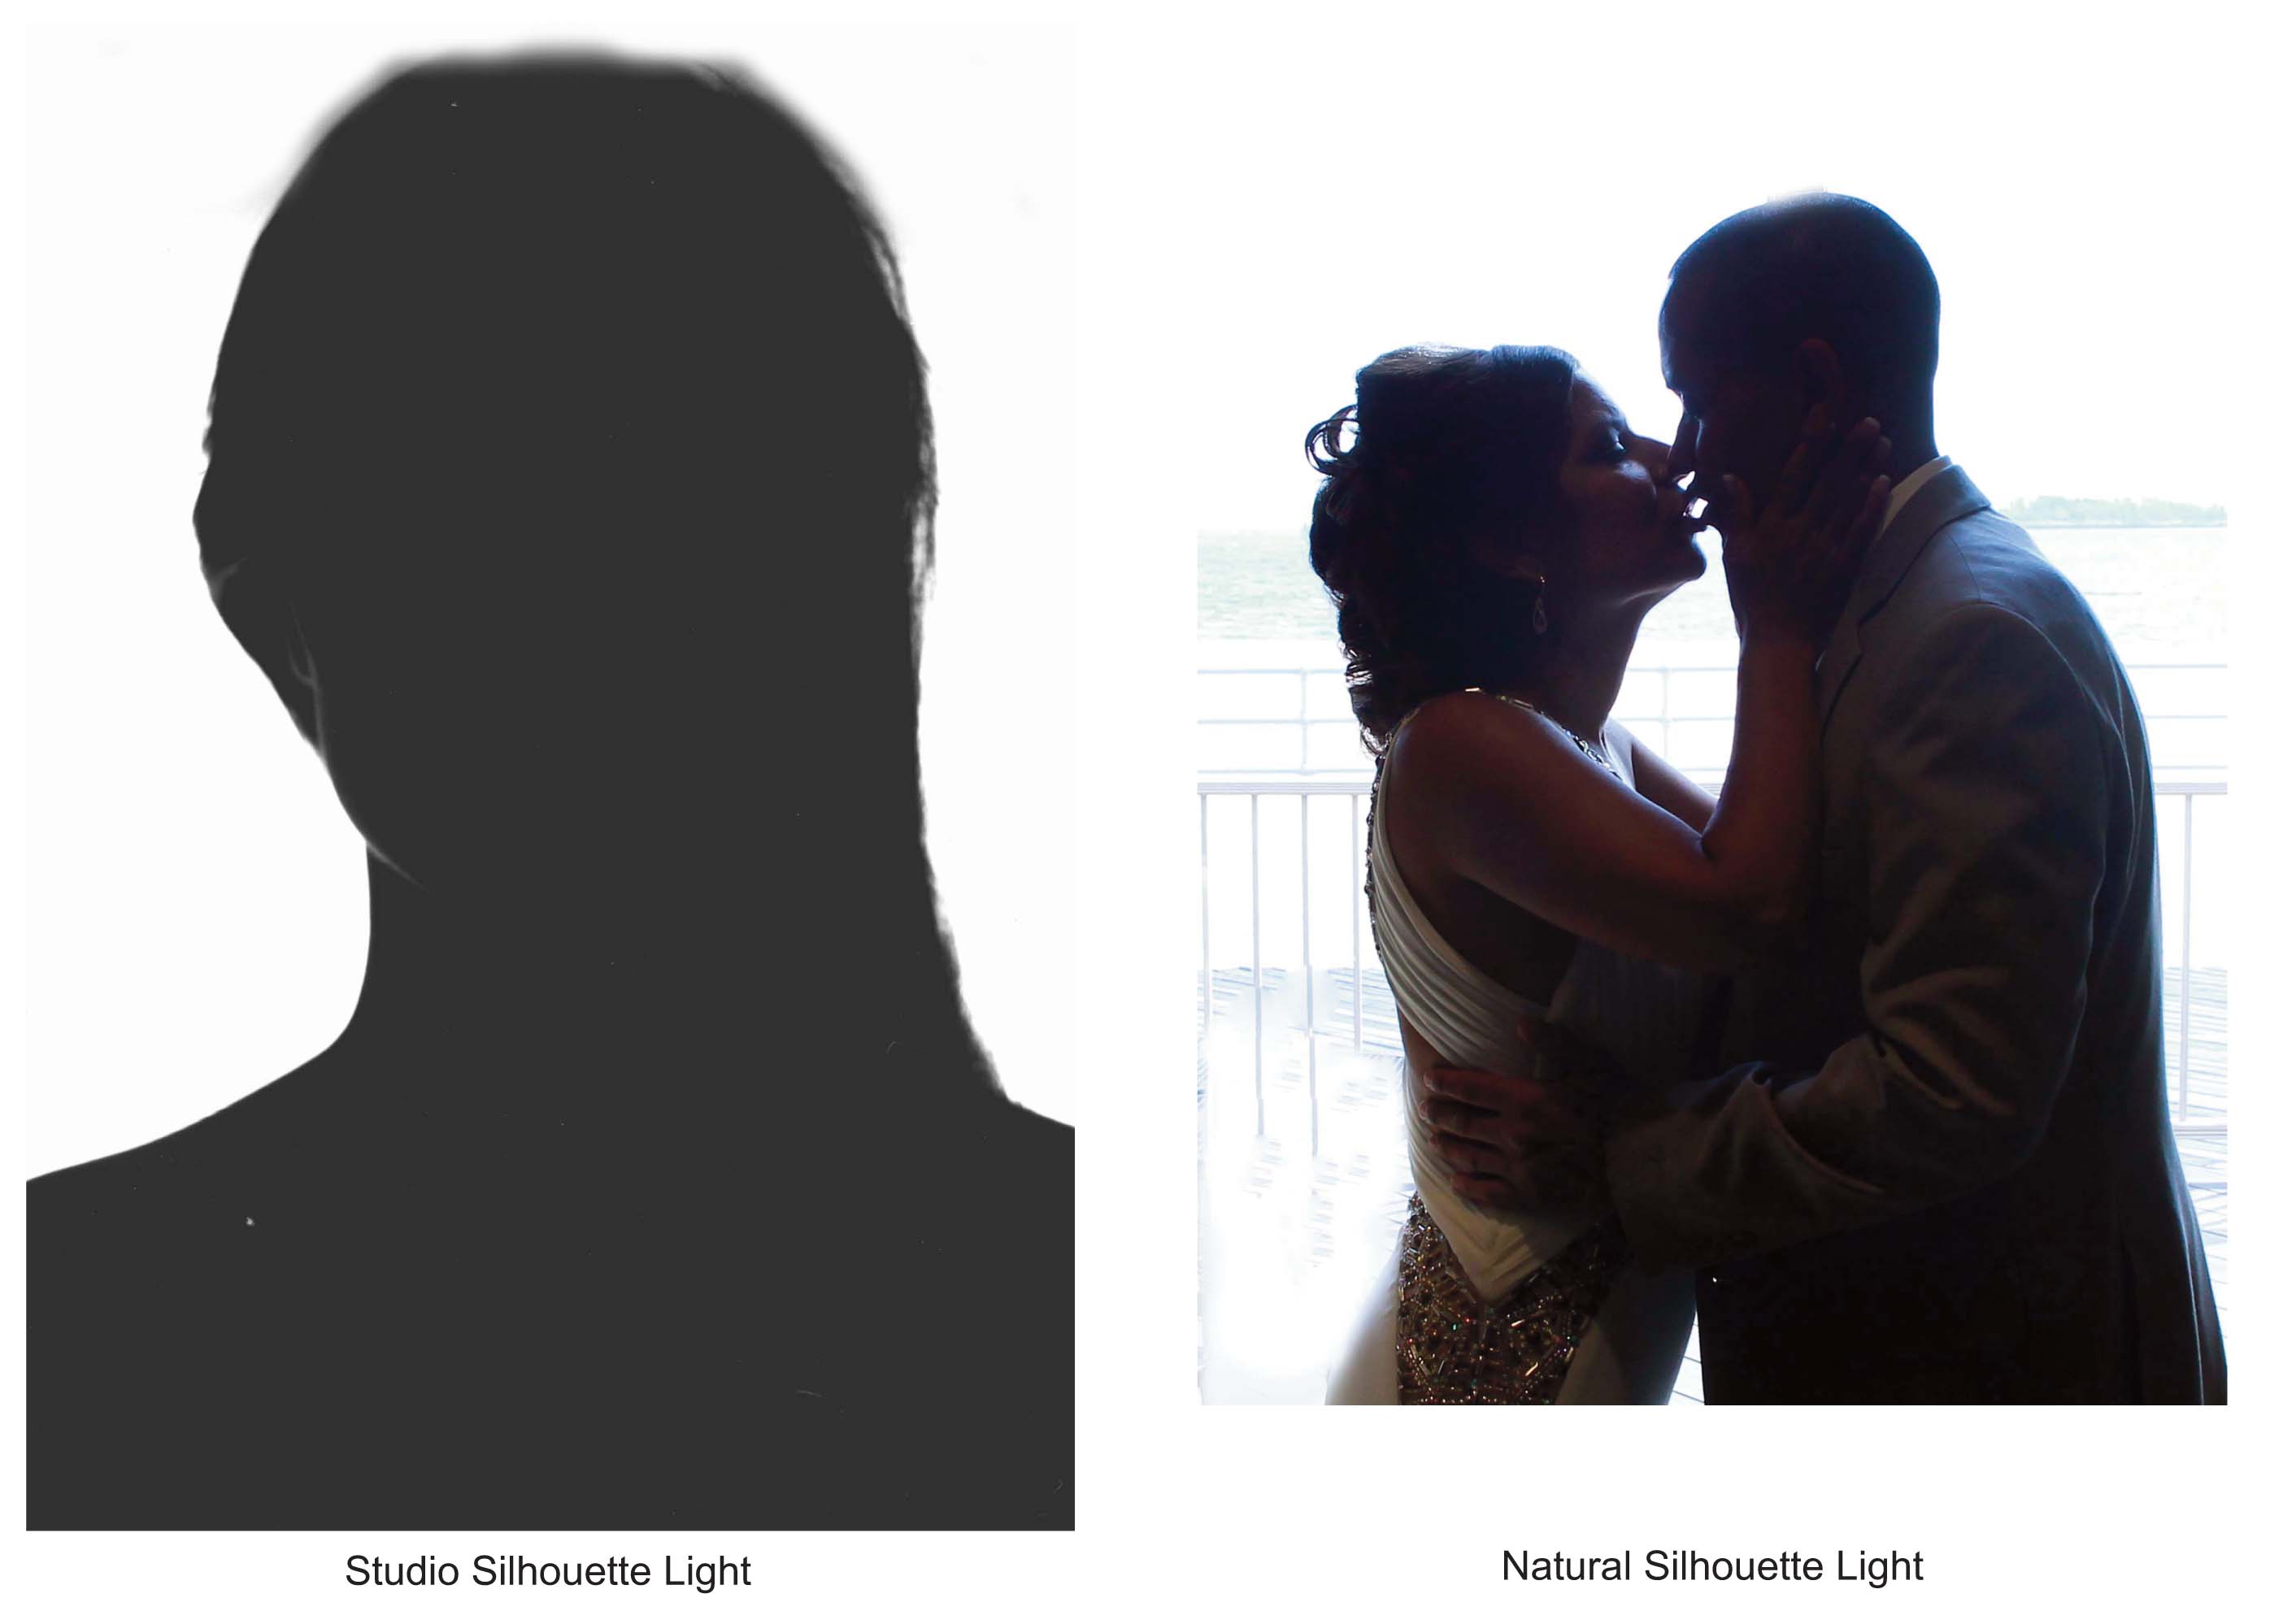
The definition of a silhouette is that the background is lit and not the subject. There should be no detail in the subject. In this natural silhouette, there was just a little spill-over from the background so that some detail on the faces can be seen. Otherwise, all the light came from behind the subjects.
In order to recognize these lightings as they occur naturally, as I said, you need to know what they look like in the studio. You can refer back to earlier blog articles in which they are explained in more detail (with diagrams of how I set them up in the studio), but knowing them will greatly improve your image-making!
William Lulow
William Lulow is a commercial portrait and corporate photographer in the Greater New York Area. His clients include IBM, Swiss Re, Westchester Magazine and Michael Baker International (Engineering), among many others. William is also a certified teacher of photography having been an adjunct professor at New York's New School For Social Research. He publishes daily blog articles on photography. His goal is to raise people's awareness of photographic principles in order to better their photographic efforts.